
Using the Visual Studio Android Emulator with Android Studio
I do most of my native app work in MacOS, but when I am working in Windows and need to fire up Android Studio, I've always had an issue running the bundled emulator. The emulator complained about Hyper-V and turning it off per the instructions did not resolve the issue. After searching for and trying multiple solutions that did not work, I had really just given up using Android Studio on Windows. Later, through my work with Xamarin and Visual Studio, I was introduced to the Visual Studio Emulator for Android, a full featured Android emulator for Windows that worked with Hyper-V out of the box!!
Getting started was easy, just download the emulator from Microsoft's Visual Studio.com site
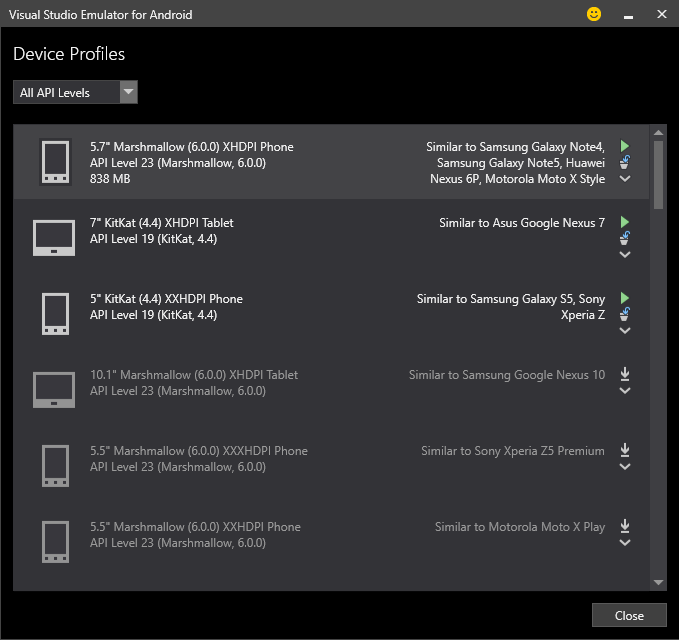
After installation, open the app and download any of the emulator profiles you are interested in testing:
Start the emulator you want and then fire up your Android Studio project. Once in Android Studio, configure it to use your new emulator by navigating to:
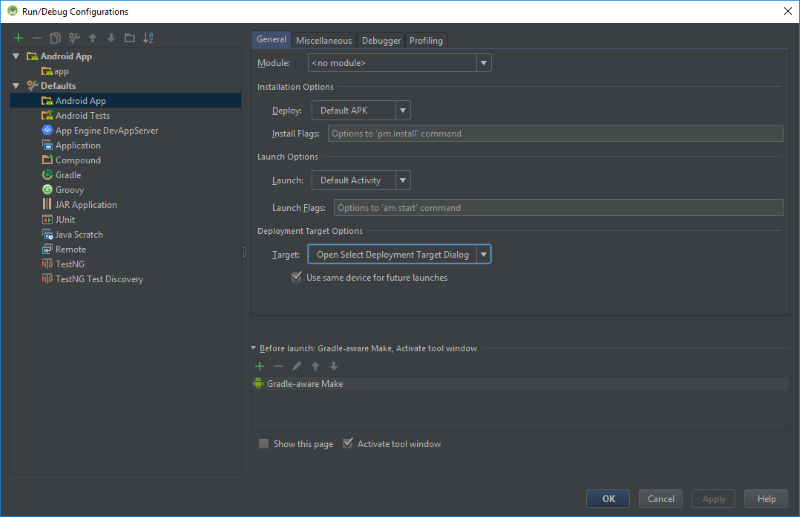
Run > Edit Configurations > Defaults > Android App
On the General tab, under Deployment Target Options change the Target option to "Open Select Deployment Target Dialog" and check the "Use same device for future launches" option, so that we can be prompted to select an emulator when we run a project in Android Studio:
Go ahead and run your app. You'll be prompted with the Select Deployment Target window:

HEY! Where's our new emulator?!?! It should appear under Connected Devices, but it does not. If it appears for you then you can stop reading and get back to work! For the rest of us, there is one more hurdle we need to get over before we are done.
The issue really boils down to where the new emulator is looking for the Android SDK. In most default installations of Android Studio bundled with the SDK, the SDK is stored under:
C:\Users\[USER]\AppData\Local\Android\Sdk
When the emulator is installed, it assumes by default that the SDK path is:
C:\Program Files (x86)\Android\android-sdk
This mismatch is what is causing the new emulator to not show up in Android Studio. You can double check the SDK location you are using from Android Studio by navigating to:
File > Project Structure > SDK Location
Make note or copy this path as we are going to update the emulator to point to this location. The emulator stores the path in the registry so we will have to make the change there. Right click on the Windows logo on your task bar, select Run and then type "regedit" in the window to launch the registry editor.
Navigate to:
HKEY_LOCAL_MACHINE > SOFTWARE > WOW6432Node > Android SDK Tools
Then change the Path value to the same SDK location mapped in Android Studio. Close regedit, restart the emulator and then try to run the app again in Android Studio.
Voilà!! Your emulator should now appear under the Connected Devices area:

Happy emulating!!!